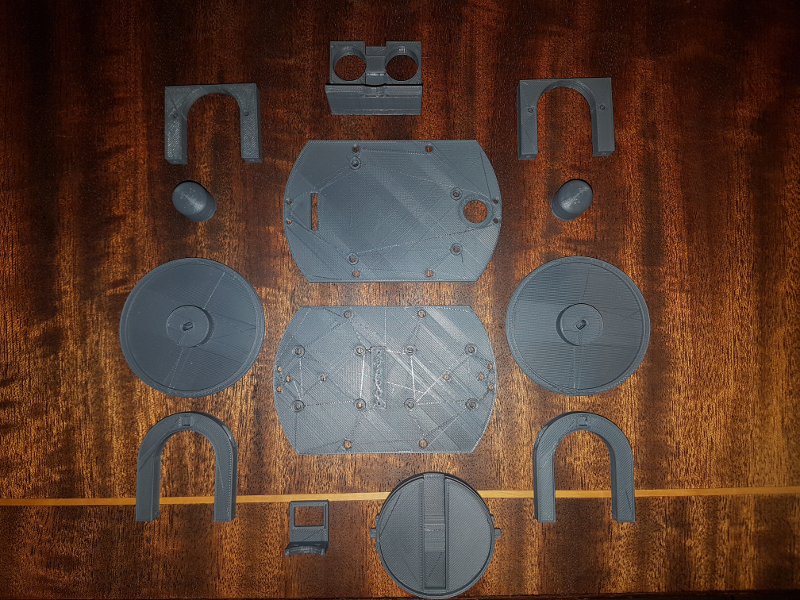
I finally decided that I should have a crack at building one of Rob Mile’s Hull Pixel Bots (http://hullpixelbot.com/)
I have completed the first step by printing out the plastic parts.
For the most part that was all plain sailing but there were a couple of interesting workarounds that I came up with for my own specialised needs.
The first of these is that I wanted to include the NeoPixel ring on my robot. This seems important to me as otherwise it is just a HullBot. In the designs on the PixelBot site the diffuser for the LEDs is done by printing with a semi-translucent filament only one layer thick so that the light can shine through. This presented me with a problem as I didn’t have any filament like that, just the grey stuff that you can see in the pictures. This is not see-through. Not even a little bit.
Whilst I am certain that I could justify the purchase of a new spool of filament to myself, I am always mindful of the need to justify the spending with my fair lady. Ultimately I decided that I would not spend all of my persuation points on this (who knows when you will need them for something else like a shiny new board game?). So what can I do instead?
Do you know what is made of semi-translucent plastic? Milk bottles! We go through milk at a fairly rapid clip, so it wasn’t long before an empty bottle became available for harvesting. Although the likes of Thingiverse are amazing sources of things to print, one of the fun parts of having a 3D printer is designing things yourself to make on it. I currently mostly use Sketchup (https://www.sketchup.com/) for creating my designs. It is fairly capable with just the free version and I use a plugin to enable me to export to the STL files that are necessary for the printer.
So I whipped up the following design to act as a mounting frame to glue my milk bottle plastic to.
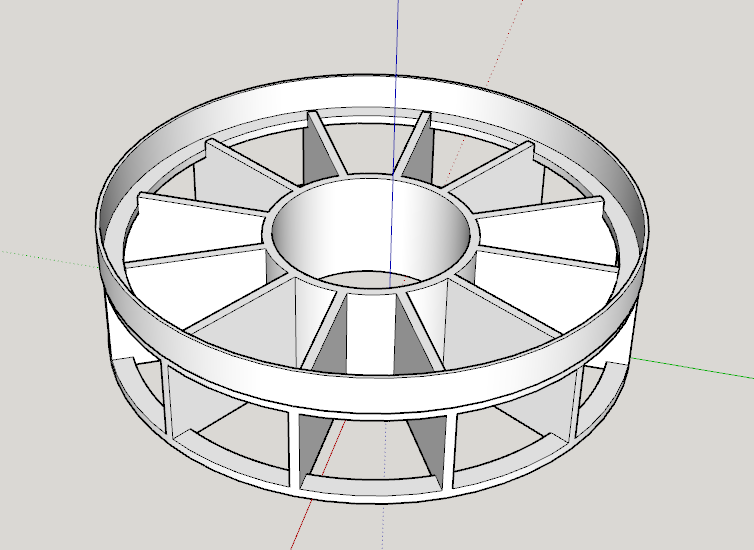
I decided to base it on the ‘light pipe’ idea that Rob used with one of his so that each of the LEDs was at least partially isolated from the others to give a more defined glowy sections. I went a slightly different way with it though. Each of mine are in segments kind of like a Trivial Pursuit pie if anyone remembers those. I also isolated a cylinder in the centre of it all as I am thinking about using a single NeoPixel in the centre as well. Each of the segments also has a window on the side of the cap.
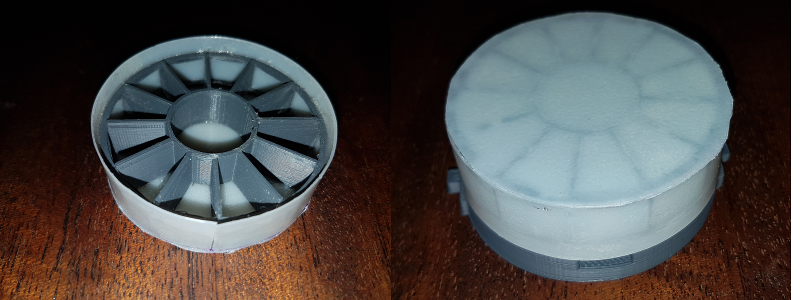
I think that it will look quite spiffy when it is all assembled and emitting light.
I have also ordered all of the electronic bits and pieces. Rather annoyingly, I am still waiting for the Arduino board to arrive. Actually it is probably for the best as I have had a load of marking to do last week and I could do with out the distraction. I am also missing the nuts and bolts so assembling it all is… problematic. What I will work on next is doing all the wiring (when the Arduino arrives) as I should be able to test all of that and play around with the programming before putting it all together.
Work around number two starts here. The base plate of the PixelBot has mounting points that perfectly line up with the 4 screw holes at the corners of the stepper motor driver boards that Rob has been using. At least that is what I assume to be the case as the next problem I encountered as the electronics started to arrive is that the stepper motor driver boards that came with the stepper motors that I ordered are not the same as the ones that Rob used with his design. This is despite the fact that I spent some time making sure that the pictures matched on the ebay listings that I was perusing. The ones that arrived did not match the photo in the listing.
Annoying problem? Or fantastic excuse to do some more fun problem solving? Can it be both?
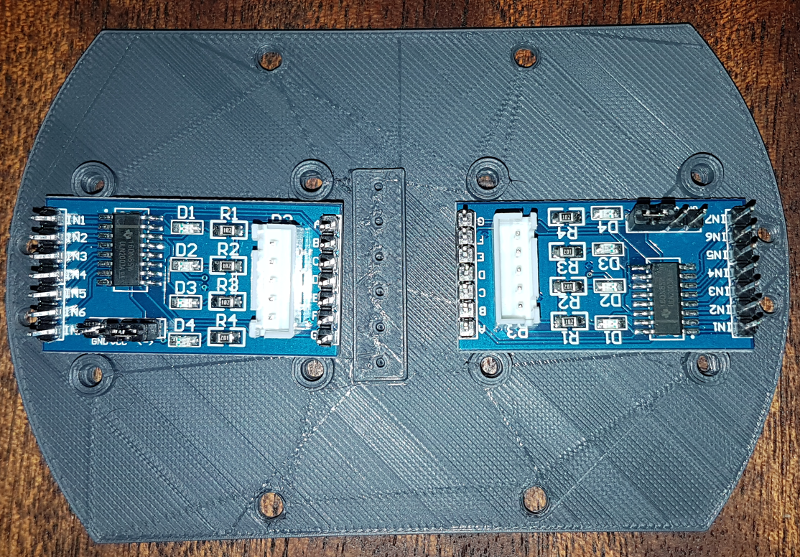
As it happens, the ones that arrived have no mounting holes at all. You can also see from the pictures they are different sizes as well.
Now presumably I could make a fuss of this with the seller, but that tends to be a frustrating experience, so I have gone another way.
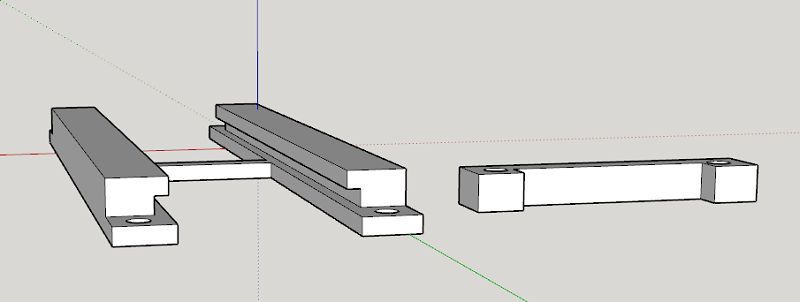
After a bit of measuring with my trusty calipers I designed a funky sled that the driver boards slide in to. Then the sled mounts to the original mounting points on the PixelBot base. Ta daa!
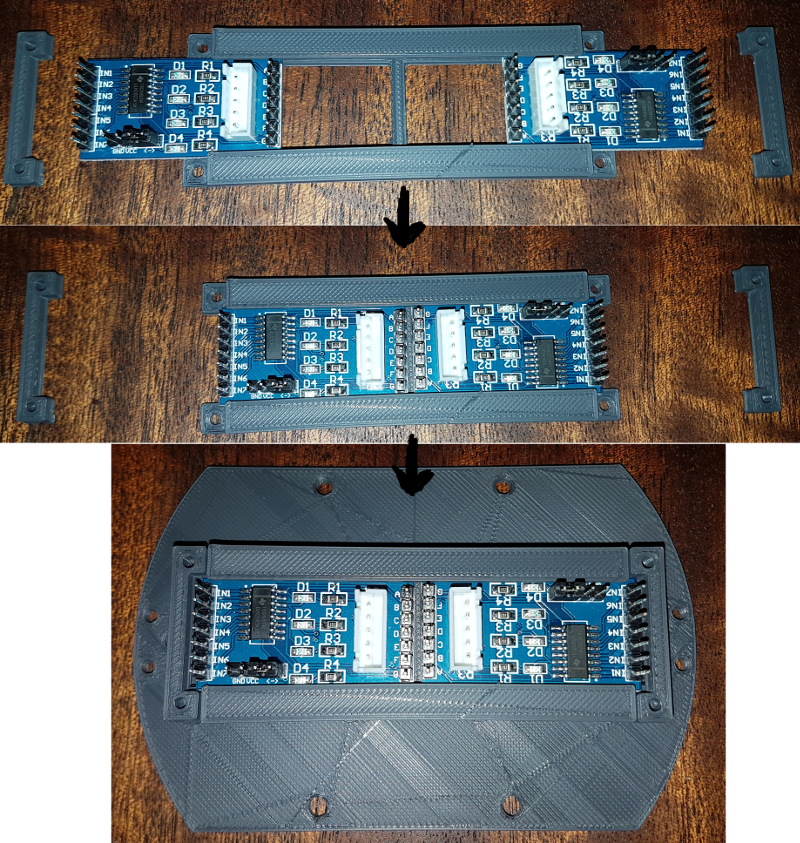
So at this point I am chomping at the bit a little to get on with the next part. Watch this space.
No comment
Say something
Thank you
Your post has been submitted and will be published once it has been approved.
OK
OOPS!
Your post has not been submitted. Please return to the page and try again. Thank You!
OK